Active Directory Domain Services (AD DS) is a crucial component for managing users, computers, and resources in a Windows Server environment. In this guide, we’ll walk through the process of installing and configuring AD DS on Windows Server.
Prerequisites
Before starting, ensure you have:
- A Windows Server installation (2016, 2019, or 2022).
- A static IP address assigned to the server.
- Administrator privileges.
Step 1: Install Active Directory Domain Services (AD DS)
Open Server Manager.
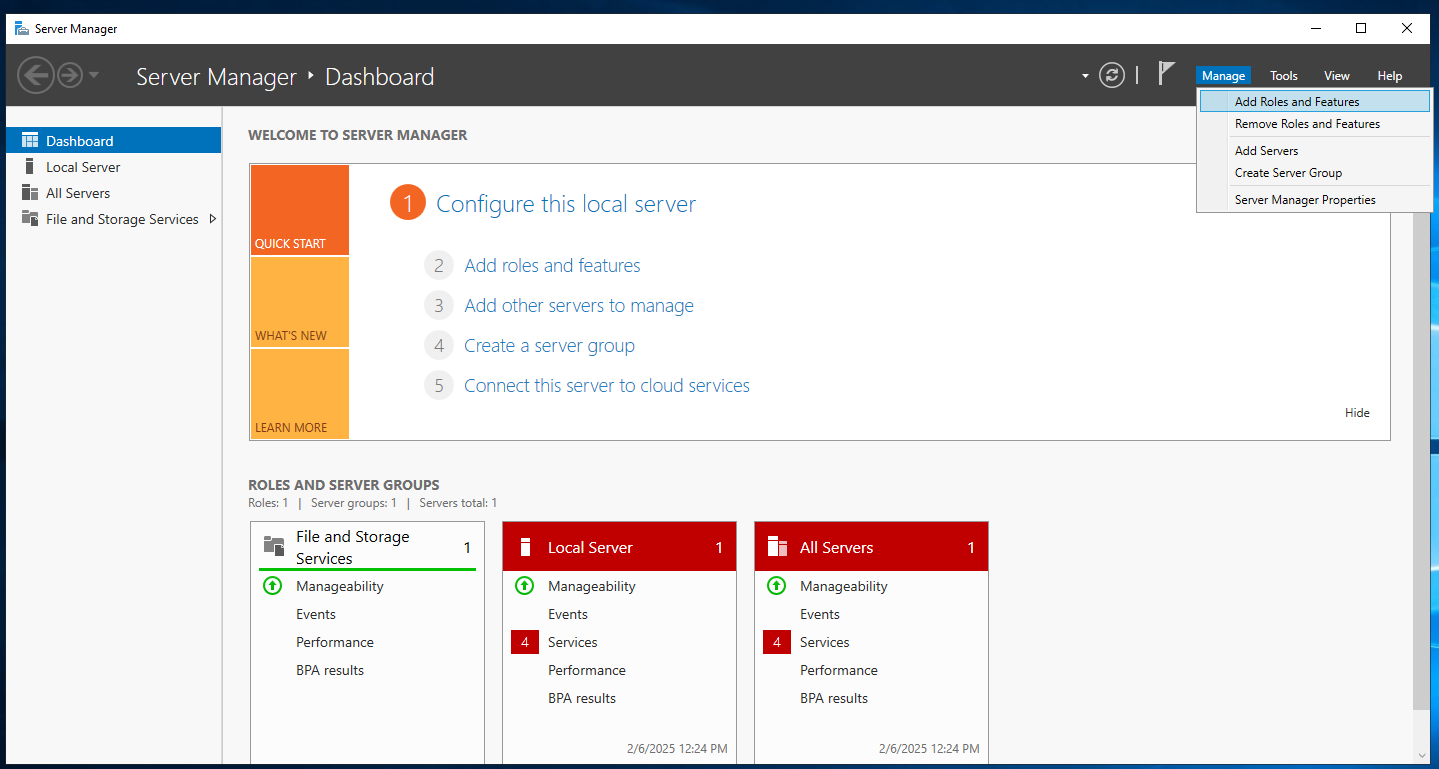
Click on Manage → Add Roles and Features.
In the Before You Begin window, click Next.
Select Role-based or feature-based installation, then click Next.
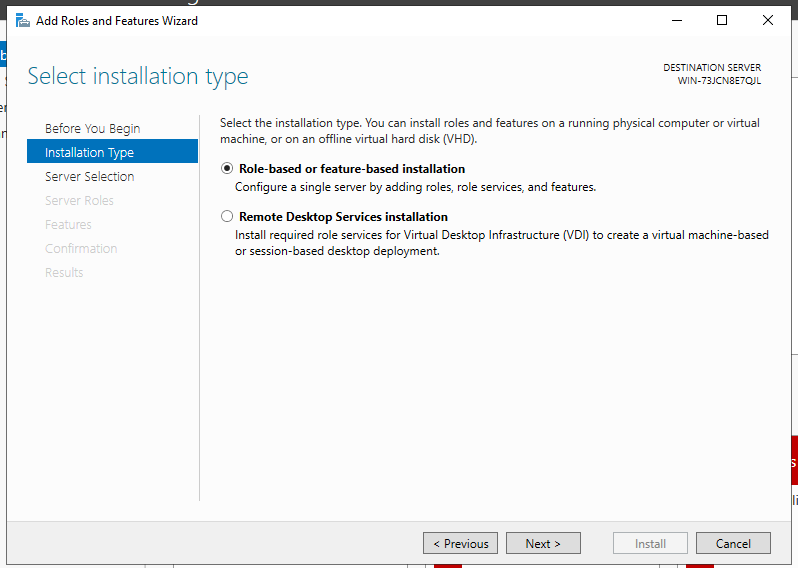
Choose the server where AD DS will be installed, then click Next.
Under Server Roles, check Active Directory Domain Services and click Add Features when prompted.
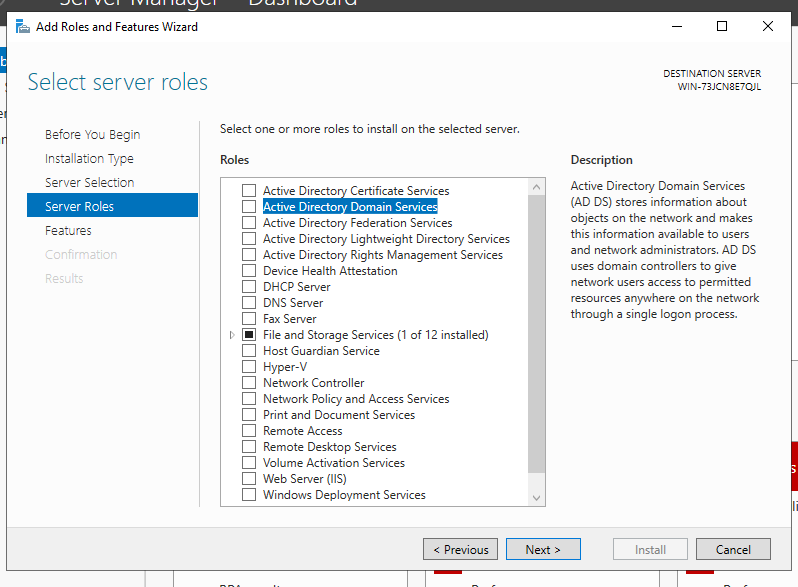
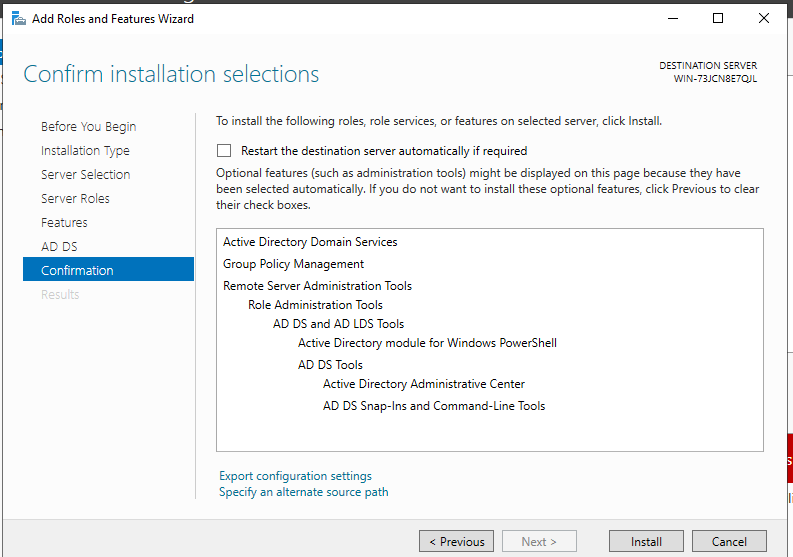
Click Next until you reach the Confirmation screen, then click Install.
Step 2: Promote the Server to a Domain Controller
Once the installation is complete, open Server Manager.
Click the flag notification and select Promote this server to a domain controller.
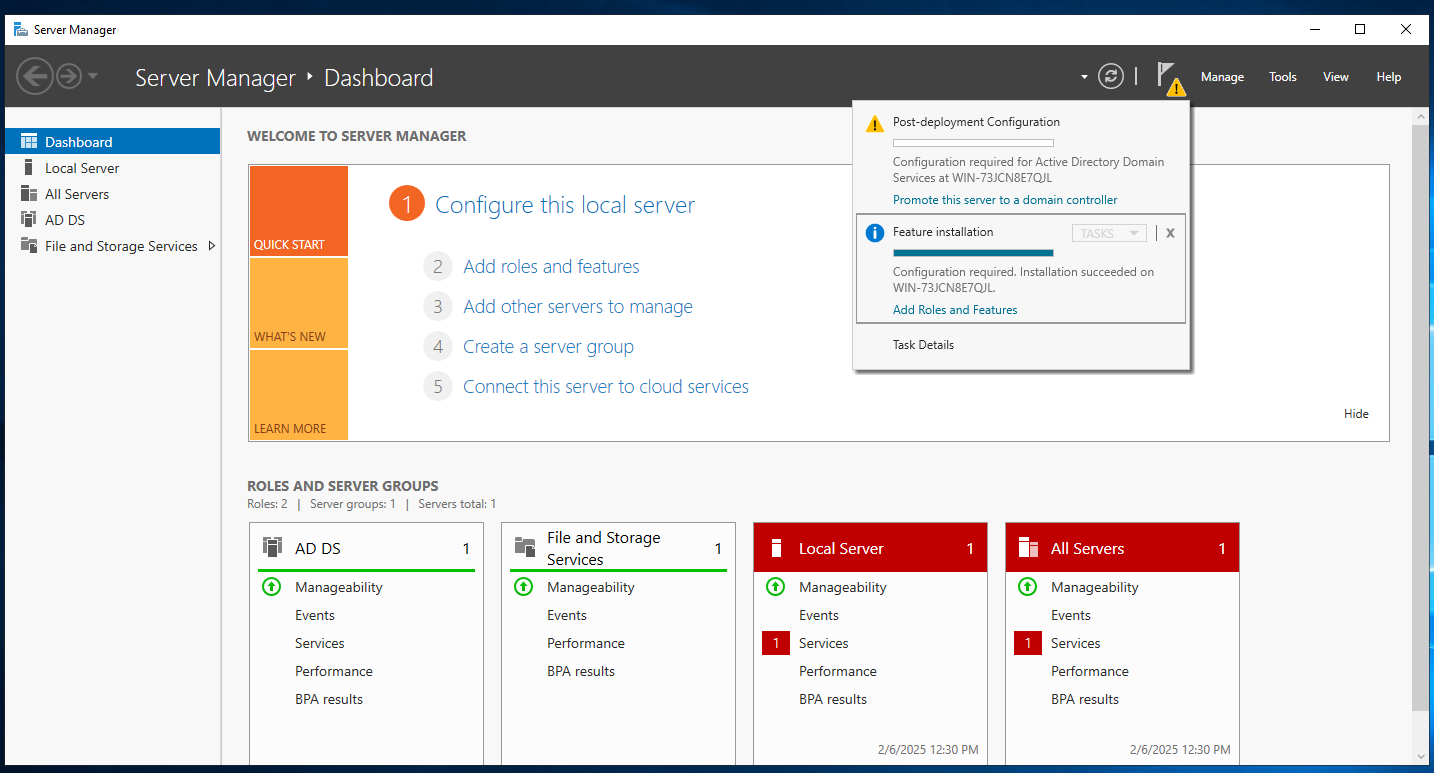
Choose Add a new forest and enter your Root domain name (e.g.,
example.local).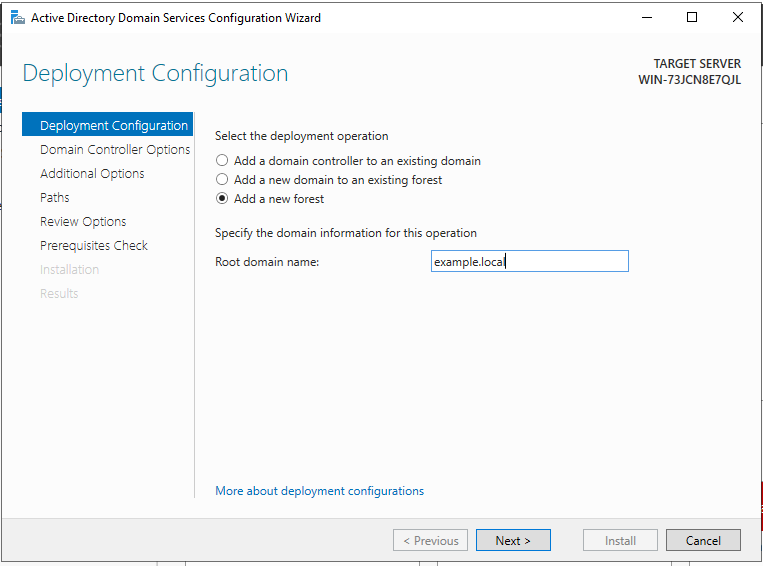
Set a Directory Services Restore Mode (DSRM) password and click Next.
Review and configure DNS options, NetBIOS name, and other settings.
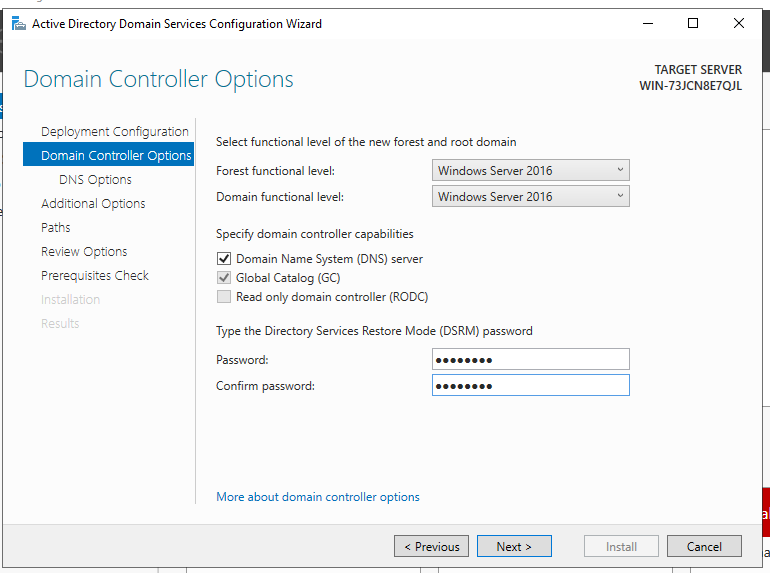
Click Next and review the configuration summary.
Click Install and wait for the server to reboot.
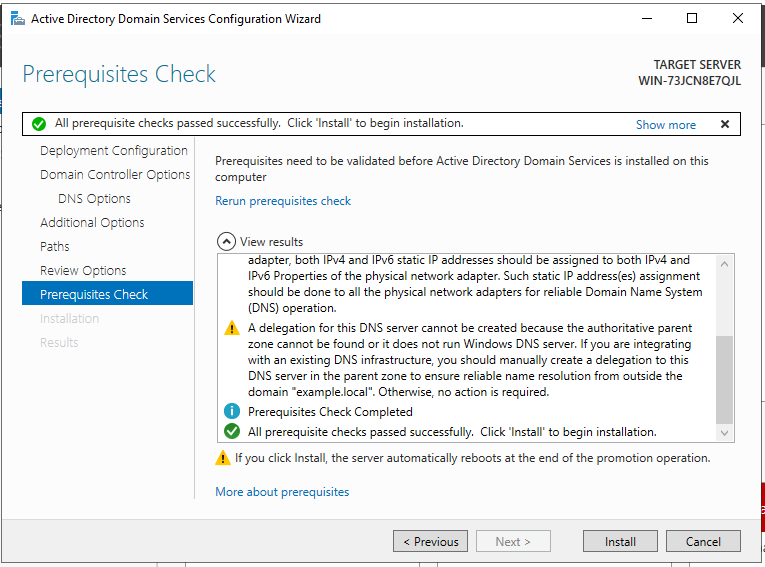
Step 3: Verify the AD DS Installation
After the reboot, log in and verify:
Active Directory Users and Computers (
dsa.msc) is accessible.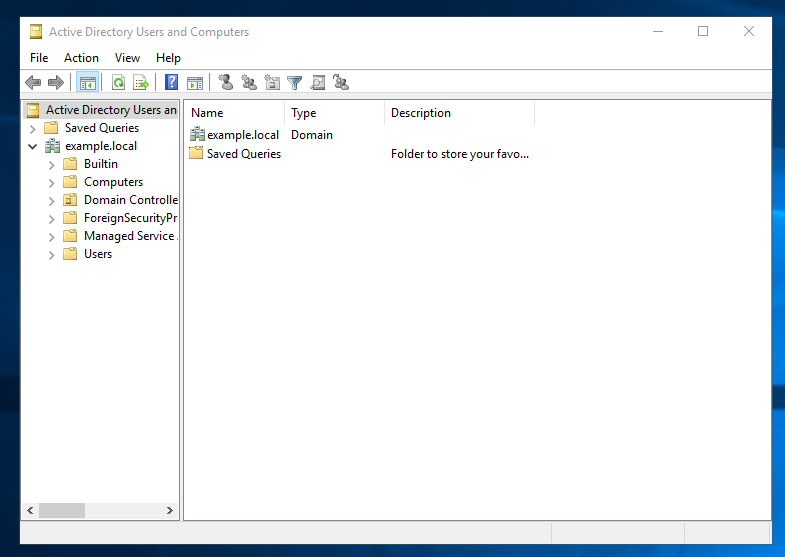
The Domain Controller is listed in Active Directory Sites and Services.

The DNS Server is correctly configured.
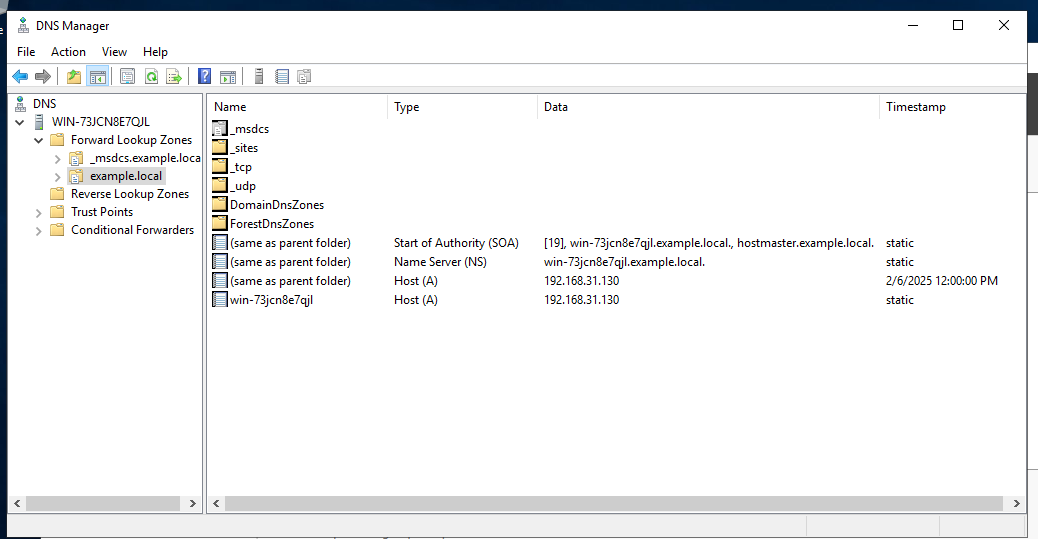
🛠 Quick Diagnostic with PowerShell
To ensure everything is working correctly, open PowerShell as Administrator and run:
PS C:\Users\Administrator> dcdiag /v